1. Introduction
An arterial line (or "art line"/"A-Line") is a thin catheter placed directly into an artery. It is connected via a fluid-filled tubing system to a pressure transducer, which provides a continuous, real-time, and highly accurate measurement of arterial blood pressure. It is considered the gold standard for blood pressure monitoring and is essential in the management of critically ill or hemodynamically unstable patients.
2. Core Components of the Kit
 A typical commercial kit contains everything needed for insertion and connection to the monitor.
- Arterial Catheter: A small, usually 20-gauge (in adults) Teflon or polyurethane catheter, often with a specialized needle (e.g., Seldinger or over-the-needle) for insertion.
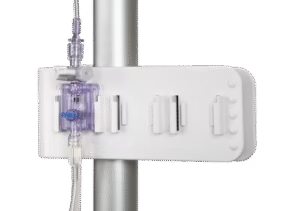
- Transducer: A small, delicate electronic device with a flexible diaphragm on one side. This is the heart of the system. It converts mechanical pressure (from the fluid column) into an electrical signal.
- Tubing & Flush System: A long, non-compliant (low-compliance) tube that connects the catheter to the transducer. It includes a continuous flush device (which provides a slow drip of saline at 3-4 mL/hr to keep the line patent) and a stopcock for obtaining blood samples.
- Pressure Bag & Saline: A 500 mL bag of heparinized or normal saline that is placed in a pressure bag, inflated to 300 mmHg. This provides the pressure for the continuous flush and for the "fast flush test."
- Cable: A dedicated cable that connects the transducer to the bedside monitor.
3. The Physics: How It Works
 The system operates on a simple hydraulic principle:
- The catheter senses the pressure pulsations within the artery.
- This pressure is transmitted through the column of saline in the non-compliant tubing to the diaphragm of the transducer.
- The pressure wave causes the transducer's diaphragm to deflect.
- This deflection alters an electrical circuit within the transducer (often a Wheatstone bridge), changing its electrical resistance.
- This change in electrical signal is sent via the cable to the monitor, which amplifies it and displays it as both a numerical value (SBP, DBP, MAP) and a characteristic waveform.
4. Indications: When Do We Place an Arterial Line?
An arterial line is not routine; it's placed when the benefits outweigh the risks of an invasive procedure.
- Hemodynamic Instability: For patients with severe hypotension or hypertension (e.g., shock, aortic dissection) where beat-to-beat monitoring is crucial.
- Frequent Blood Sampling: For patients who will need frequent arterial blood gas (ABG) or lab draws (e.g., during major surgery, in the ICU), sparing them from repeated needle sticks.
- Complex Surgery: Procedures with the potential for rapid blood loss or fluid shifts (e.g., cardiac surgery, major vascular surgery, liver transplantation, trauma cases).
- Requirement for Tight Blood Pressure Control: In neurosurgery, to maintain a specific cerebral perfusion pressure, or in vascular surgery to ensure adequate perfusion of a graft.
- Inability to Measure Non-Invasively: In morbidly obese patients or those with severe edema where cuff readings are unreliable.
5. Common Insertion Sites
6. The "Zeroing and Leveling" Ritual (CRITICAL STEPS)
For the reading to be accurate, these two steps must be performed correctly and anytime the patient or transducer is moved.
Leveling: The transducer must be leveled to the phlebostatic axis. This is an external anatomical landmark that approximates the level of the left atrium.
- How: Find the intersection of two lines: 1) The 4th intercostal space (mid-sternum), and 2) The mid-axillary line. The transducer's stopcock must be at this exact height.
- Why: This eliminates the effect of hydrostatic pressure. If the transducer is too low, the reading will be falsely high. If it's too high, the reading will be falsely low.
Zeroing: This process calibrates the system, setting atmospheric pressure as the zero point.
- How: With the transducer leveled, open the stopcock to air (by turning the stopcock off to the patient and open to the air). Press the "zero" button on the monitor. Once the monitor reads zero, close the stopcock to air and re-open it to the patient.
- Why: It ensures the measurement is relative to atmospheric pressure, providing an accurate gauge of the patient's true arterial pressure.
7. Interpreting the Arterial Waveform
The waveform provides more information than just the numbers.
- Systolic Upstroke: The sharp, initial rise. Its steepness reflects left ventricular contractility.
- Systolic Peak: The maximum pressure.
- Dicrotic Notch: A small, brief dip on the downstroke. This marks the closure of the aortic valve.
- Diastolic Runoff: The smooth decline after the dicrotic notch, reflecting peripheral runoff.
- Mean Arterial Pressure (MAP): The physiologically most important value. It represents the average pressure driving perfusion to the organs. The monitor calculates this automatically (MAP ≈ DBP + 1/3(SBP-DBP)).
8. Troubleshooting the Waveform
Overdamping (Sluggish): The waveform is soft, rounded, and lacks sharp detail. Systolic pressure is falsely low, and diastolic pressure is falsely high.
- Causes: Air bubbles, blood clot, kinked tubing, a catheter against the artery wall.
- Fix: Check the entire system for bubbles, clots, and kinks. Perform a "fast flush test" (see below) to assess.
Underdamping/Resonance (Oscillating): The waveform has exaggerated, sharp peaks and oscillations after the dicrotic notch. Systolic pressure is falsely high, and diastolic pressure is falsely low.
- Causes: Excessively long or stiff tubing, "whipping" of the catheter.
- Fix: Shorten the tubing, ensure it's not too stiff. A small amount of damping can be introduced by adding a short, compliant section of tubing.
The Fast Flush Test: By opening the flush valve, you send a high-pressure (300 mmHg) square wave down the system. The system should return to baseline with one or two small, quick oscillations. More oscillations indicate underdamping; a slow, sluggish return indicates overdamping.
9. Potential Complications
- Thrombosis/Ischemia: The most feared complication. A clot can form on the catheter, obstructing the artery and compromising blood flow distal to the insertion site.
- Emolism: Air or a small clot can be dislodged and travel distally.
- Infection: A risk with any invasive line, leading to local infection or even sepsis.
- Bleeding/Hematoma: Can occur at the insertion site, especially if the patient is anticoagulated.
- Nerve Damage: Rare, but possible from direct injury or hematoma compression.
- Pain: The patient may experience discomfort at the insertion site.
Key Takeaways
- Accuracy is Everything: An arterial line is only as good as its setup. Leveling and zeroing are non-negotiable.
- It's More Than a Number: The shape of the waveform provides critical information about cardiac function and vascular tone.
- Troubleshoot Systematically: Use the fast flush test to differentiate between damping and resonance issues.
- Respect the Invasiveness: It is a surgical procedure with real risks. Perform an Allen's test for radial lines and maintain strict sterile technique. Monitor the site and distal perfusion frequently.